


 Get 0.05 TON 💎
Earlier Versions
| Name | Size | Uploaded | Game Version | Downloads | |
| AmazingArcheologyV3.3.jar release | 24.55 MB | Aug 27, 2022 | 1.18.2 | 1 |  Download Download |
| AmazingArcheologyV3.2.jar release | 24.44 MB | Aug 16, 2022 | 1.18.2 | 174 | Download |
| AmazingArcheologyV3.1.jar release | 24.34 MB | Aug 13, 2022 | 1.18.2 | 84 | Download |
| AmazingArcheologyV2.5.jar release | 24.24 MB | Aug 9, 2022 | 1.18.2 | 83 | Download |
| AmazingArcheologyV2.jar beta | 24.15 MB | Aug 8, 2022 | 1.18.2 | 264 | Download |
| AmazingArcheologyV1.jar alpha | 24.10 MB | Jul 30, 2022 | 1.18.2 | 9 | Download |
Screenshots


Description
Suspicious Materials are the key to archeology- while these resemble dirt, stone, netherrack, and deepslate respectively; they have slight differences that hint at their contents. Craft a Copper Brush using a copper ingot and string- these can be used on suspicious materials. Each block has 16 layers, and each brushstroke removes 1-4 of them. The further you go, the better loot you’ll get, and the less damage the brush will sustain. Go too far though, and both your brush and the block will break, dropping nothing.
- Different materials excavate at different speeds, and with different levels of randomness. (Dirt and Netherrack are fairly easy, with stone being a bit trickier, and deepslate being the hardest to excavate properly.)
- Enough successful excavations can cause your brush to oxidize, making it work slower and more predictably. (Thus increasing your odds of success.)
- The loot is determined partly based on where the block is found, (suspicious materials near a ruined town, for example, will have different drops than suspicious materials in a graveyard), and have rarity based on how close you get the block to having only one layer left.
- Brushes can be Enchanted with Fortune, (Each level gives a 50% chance of an additional, lower level drop); Unbreaking, (Any level prevents breakage if you go too far); Mending, Silk Touch, and Efficiency, though the last is completely useless.
- All suspicious blocks can be mined and moved around with silk touch.
- While suspicious materials will eventually be most common around various new structures, right now they are just found in small deposits, usually exposed to air. Suspicious Stone and Deepslate generate underground in their respective layers, usually in the vicinity of caves; whereas Suspicious sand exclusively generates in rivers and on beaches.
- Special Oxidized versions of brushes will eventually be found in a unique structure- each level of oxidation decreases the randomness of suspicious blocks, and increases the time you have to excavate them.
————————–
Copper Spears can now be produced using, (you guessed it), two sticks and a copper ingot. These weapons are, for the most part, an early-game version of a trident. However, they have some unique properties that make them worthwhile.
- A single ingot and two sticks makes three spears; up to sixteen can be held in one slot. They can be thrown very quickly.
- Upon hitting an enemy, copper spears have a small chance of ‘ageing’ into a more oxidized variant; Copper Spears can become Exposed, Weathered, and eventually Oxidized. More often though, they’ll just break.
- More oxidized variants deal more damage, have better range, and are less likely to immediately break after being used. A set of fully oxidized spears is actually a pretty effective weapon, as they can deal as much damage as a trident, and can be thrown much faster; albeit at a shorter range.
- Better yet, spears disable shields for a little over three seconds if you chuck one at a player who thinks they’re clever.
- Finally, you can use Amethyst shards in place of copper to create single Amethyst Spears, which are about the same as a regular copper spear, but far less likely to break. (And drop their shards if they do.)
- …Using a new material, you can make an even more potent variety of spear.
———————-
Vessel Pieces are a new item that can be found through archeology, and will eventually be found in Woodland Mansions and Pillager Outposts. Combine four Vessel Fragments around dragon’s breath, alongside four unique ingredients, to create a unique Totem.
- There is a different totem variety for each type of potion; in general, they provide an ambient effect similar to that of their potion, with a couple exceptions. (Such as the Totem of Vanishing rendering the wielder invisible after taking damage, the Totem of Infliction acting like a more powerful variety of thorns, the Totem of Levitation allowing for brief hovering, or the Totem of Venom inflicting poison on nearby mobs.)
- Totems can be dual wielded, with phenomenally entertaining results. (If you don’t believe me, take the totem of Hurtling and the Totem of Leagues for a spin.)
———————
Fulgurite, (Fossilized Lightning), is a new, rare material, exclusively obtained when lightning strikes the earth- specifically, dirt, sand, or other sediment-type materials. Small deposits of Fulgurite can form when lightning strikes.
- Fulgurite can be mined with Silk Touch, or broken to produce Lightning Shards. These in turn can be used around a Fire Charge to create a Lightning Charge, which can be used to summon a lightning bolt during rainy or stormy weather. They also act as an ingredient for certain gadgets.
- Lightning Charges can be fired from dispensers, with reasonably spectacular results. (And yes, this is purely because I cannot help but adore the idea of a lightning cannon.)
- Lightning Spears can be produced by using Fulgurite Shards as a spear-tip. In rainy or stormy weather, they summon lightning on their target, and break immediately.
- All fulgurite materials glow in rainy or stormy weather. (When they can be used.) Fulgurite blocks emit electrical sparks when it is raining or storming.
- Frost Charges aren’t made of fulgurite, or really related to them, but they’re another elemental item you can make by surrounding a fire charge with prismarine crystals. They freeze water when used/dispensed, and are an ingredient in certain gadgets.
———————
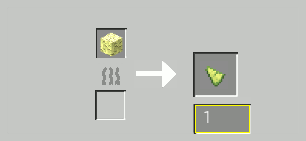
Ceramic Shards are currently pretty difficult to obtain in survival- they will eventually be obtained by finding shards in various structures, in addition to suspicious materials. In the meantime, you can make the basic shard by smelting bricks, or trade with cartographers for some more colorful varieties.
- Shards come in 16 different colors, and can be used to craft 16 different colors of Ceramic Pots, each of which has three different shapes. (Small, Tall, and Large), and each of which has unique illustrations, which may or may not contain subtle lore hints. There are thus, in total, 51 different types of pot.
- Pots can be used to store stuff, in addition to providing cool decorations. A small pot can store 96 of a single item type, while large and tall pots can store 128 of a single item type. You can right click a pot to stow a stack of items inside, left click it to dispense single items, and shift-left click it to empty it out entirely. (Or just break it.)
- Mine pots with Silk Touch if you want to pick them up; otherwise you’ll just get the respective shards.
——————–
Porcelain Tiles can be produced by blasting bones in a blast furnace. You can use them to craft sixteen different patterns of Porcelain Tile blocks, which make extremely pleasant noises, and shatter if something falls too hard on them.
- The Shatter behavior has also been extended to glass and ice blocks, (with the exception of tinted glass.) Porcelain, Normal Ice, and Glass break without dropping anything if an entity falls on them far enough to take damage. (I have tested this, and can say for certain that it is extremely entertaining.) Feather Falling and Slow Falling both prevent breakage, (as does being in creative mode), and slow falling entities (such as chickens) do not break porcelain or glass.
- Porcelain Tiles can be used to make Porcelain Vases, which are similar to Ceramic Pots, but feature simple colored patterns instead of complex and puzzling illustrations. Also, they are way more fragile, and break if hit or shot.
- Like Pots, Porcelain vases come in three shapes, and sixteen different colors. You’ll need Silk Touch if you want to move them around without immediately breaking them.
- Porcelain items break when used to hit something, or if you’re holding them in your main or off-hand when attacked.
Finally, Porcelain can be used to make Flower Vases, which are a slightly taller variant of flower pots, more suited to a modern palette. They have the same function, and anything that can be planted in a flower pot can be planted in a vase.
——————-
Music Discs now require Disc Fragments, which are currently pretty hard to obtain in survival, but will eventually be found in loot chests in specific structures across the world. Nine fragments are required to craft a complete disc of the corresponding type.
- Disc Fragments can be plugged into the jukebox, but they’ll simply play a short snippet of their respective track before being ejected.
- A couple new discs have been added; all using unused tracks from Volume Alpha and Beta. The new discs are as follows:
- ‘Disc #2,’ (The original title is ‘Death,’ by C418. This one is a Lore disc that seems at least a little less puzzling, if a lot more open ended than the others.)
- ‘Kyoto,’ (A dark, but pretty string and flute piece.)
- ‘Moog City’ (The unused first part of one of the title tracks- an epic, rising synth track.)
- ‘Intro,’ (A fantastic and fitting conclusion to the final album, this disc will be exceptionally hard to obtain.)
- ‘Droopy’ (A combination of ‘Droopy Likes your Face,’ and ‘Droopy Likes Ricochet,’ both halves of the song can be found separately, and combined to make the complete disc.)
- ‘11?’ (Supposedly, you might be able to repair that creepy, broken old disc… if you could only find the right material.)
- Creepers no longer drop music discs when killed by skeletons; instead, they can drop fragments of the ‘Ward,’ ‘11,’ and ‘Cat’ music discs when killed in this exact manner. (Still not sure why this is a thing, or why most of the discs are obtained this way, but I couldn’t bring myself to remove it entirely.)
- Cats have a small chance of bringing you a fragment of the ‘Cat’ music disc as a morning gift.
——————
Geodes are a new mineral-type item that can be found through archeology, and serve a fairly simple use. A geode can be combined with any mineral in a Smithing Table, (Iron ore, Copper Ore, Gold Ore, Emerald, Lapis, Amethyst, Redstone, Quartz, or Diamond); and can then be smelted to multiply whatever mineral it was provided with. They will exclusively be obtained through archeology.
- There are two sizes of geode, (small and large), with large geodes being rarer and more powerful.
- The amount of minerals produced is based on their rarity. Geodes produce minerals as follows:
- Redstone Geode ~ 9/20 Redstone Dust
- Copper Geode ~ 8/14 Raw Copper
- Amethyst Geode ~ 7/13 Raw Amethyst
- Quartz Geode ~ 8/14 Nether Quartz
- Iron Geode ~ 6/12 Raw Iron
- Emerald Geode ~ 6/10 Emeralds
- Lapis Geode ~ 6/12 Lapis Lazuli
- Gold Geode ~ 5/9 Raw Gold
- Diamond Geode ~ 3/6 Diamonds
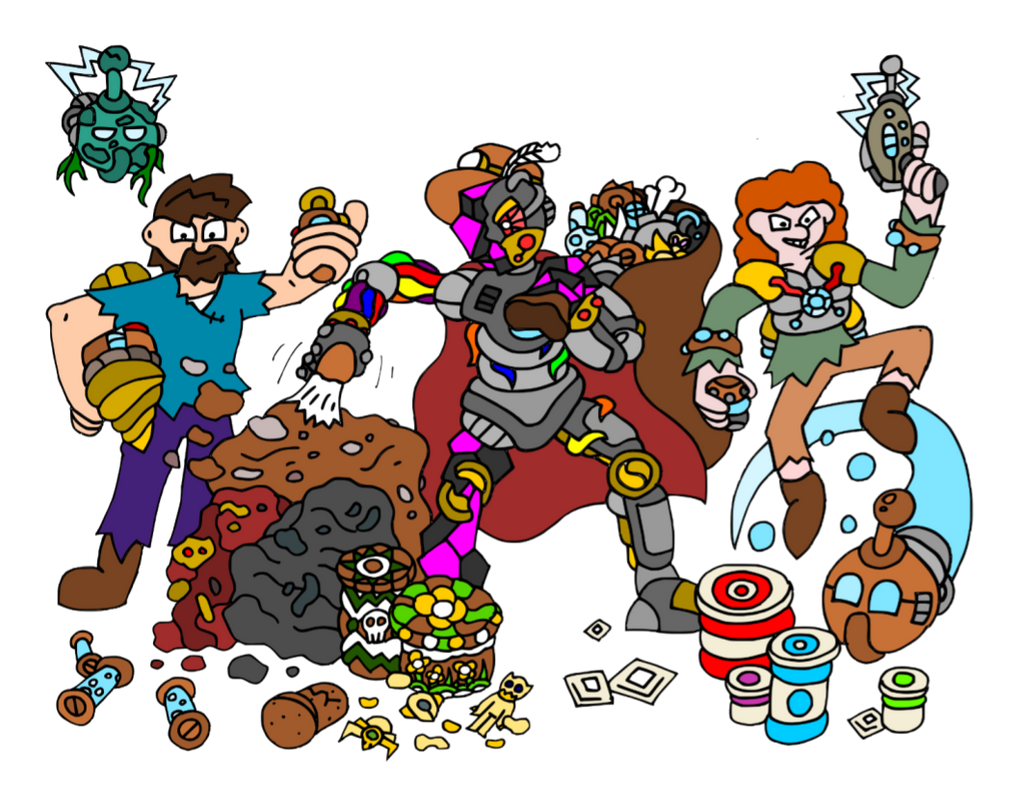
Structures: For the most part, sadly lacking in variety of interest. Once you’ve seen one, you’ve seen ’em all.
Archeology: A system sadly missing from Minecraft ever since its early conception. My mission: To add a vanilla-friendly archeology system to Minecraft, with a bunch of other (mostly) related new additions to boot! With Mindthemood’s bits, bobs, and buildings; you can expect:
- Overhauled Vanilla Structures! Right now, just dungeons and witch huts have been overhauled, but much more is planned.
- A fully fledged archeology system, requiring some skill to excavate different materials; obtain vanilla loot from successful excavations, as well as broken disc fragments, ceramic shards with which to reassemble old pottery, pieces of new totems with 16 unique abilities; and old machinery with which to assemble all sorts of unique gadgets. The better you do, and the rarer the material, the better loot you’ll get- go too far though, and you’ll be rewarded with nothing whatsoever.
- Over 91 unique Ceramic Pots and Porcelain Vases; in addition to providing a unique storage solution, each type comes in sixteen different colors, and three different shapes- colored ceramic shards can exclusively be obtained through trade and archeology, and every single ceramic pot has a unique illustration… possibly with lore implications, if you’re so inclined.
- A wide variety of Gadgets and Gizmos, including double-jump chestplates, power tools, ore detectors, a wide assortment of energy blasters, and plenty more to boot!
- Plenty of other miscellaneous features, including unique spears, music discs, elemental items, a new mineral obtained exclusively through lightning, and, just as a side note, Copper Golems, (at least, my interpretation of them), which should still be just as adorable as you would hope!
The ultimate goal of this mod is to overhaul every structure in the game- right now, dungeons have been completed. However, in it’s current state, there’s a few things worth noting:
- Some features, (Including special brushes, loot items such as custom totems and music disc fragments, custom enemies, etc), are not currently available in survival mode. They can still be tested out in Creative Mode, and will gradually be implemented alongside new structures.
- Many structures, (at least the older ones), are hard coded into the game, and can’t simply be overridden. As such, this mod will generate new and improved versions of structures alongside old ones. (If you only want the new and improved structures, you can turn off naturally generated structures when creating a world- HOWEVER, keep in mind that only the structures I’ve currently finished will generate in your world if you choose this option.)
- …In the meantime, while I encourage checking out whatever structures I’m working on, I have to recommend waiting until all the structures are complete if you intend to use this in a long-term survival world.
Version 2.5 exclusively adds archeology, without changing structures. Versions 3.1+ will gradually add new structures, w/out replacing vanilla ones
STRUCTURE CHANGELOG
Improved Dungeons, which now have deepslate/normal variants, feature slightly better loot, and generally look nicer.
- Dungeons can be small or large, though all include a single spider, zombie, or skeleton spawner.
- Small dungeons generate two side chambers, and large ones generate four. Side chambers can consist of crafting stations, dorms, collapsed entrances, and loot chests.
- Dungeons generate with more specific conditions, to prevent them from generating near mineshafts, strongholds, and water sources.
- Vanilla dungeons still generate; however, if you really hate them as much as I do, check out ‘Mindthemood’s Dungeon Removal Committee’ to deal with that particular problem.
Improved Witch Huts, which now have multiple layouts and more robust generation processes.
- Witch huts can be small, large, or oblong; and have further randomization for entrances, pillars, and roofing. Plants, (including moss, vines, and foliage for the planters), is randomly generated.
- Witch huts always spawn a witch, usually spawn a cat, and have a small chance of spawning pillagers, vindicators, and, (very rarely), evokers. Witches no longer respawn around the hut.
- Witch huts generate occasional stakes in a large radius around the hut, indicating their presence. They’re about as rare as before, and you’ll generally find one or two in a decently sized swamp.
- Witch Hut loot has been overhauled, (which is to say, I added loot to witch huts.) You can now find lingering potions, golden apples, disc fragments, and other rare items inside- a welcome source of early-game valuables.
ARCHEOLOGY CHANGELOG
ARTIFICERY CHANGELOG
The Artificery Table is your key to the wonderful world of tinkering with broken machinery to create weapons of mass destruction. (Or helpful tools, I guess.) The table is crafted using two broken machinery and two smooth stone.
- Input three ingredients on the left side of the table. (Specifically, three valid machine-type ingredients. This includes broken machinery, power cells, diamonds, metal ingots, fire/frost/lightning charges, redstone dust, etc.) Different ingredients are more or less powerful based on their rarity.) At least one of the ingredients needs to be machinery, and no more than one of the ingredients can be elemental.
- Once you input valid ingredients, an icon will appear indicating how many experience levels the machine will require. (And whether or not you have enough.) The table requires one, two, four, or eight levels of EXP depending on the value of the ingredients.
- If you have enough EXP, you can consume the ingredients to offer up three randomly selected options of gadget, each selected at random based on the input ingredients. You can only pick one, so choose wisely!
—————————–
Several New Ingredients related to Artificery can now be obtained, in addition to the previously mentioned Lightning and Frost Charges.
- Power Cores are a fairly rare and important new block that can be both used as an ingredient, and obtained via. artificery. They have several useful functions: They replace pumpkin heads as the means of summoning golems, (Summon an Iron Golem using three iron blocks and a power core in the center, or a copper golem using a copper block adjacent to the core), they can charge other gadgets that require power, and they can also charge Power Cells, a more common ingredient/product that can be used to store energy with which to recharge gadgets on the go. …Admittedly, you could just carry around a power core, but they’re pretty valuable- in addition, activating a power core with redstone launches you backwards with considerable force. While this can make for a phenomenally entertaining parkour mechanic, it’s a bit of a nuisance if you need to quickly recharge items in a tough situation.
- Finally, four types of Machinery can be found through archeology. Broken Machinery is the most common and least helpful; Old Machinery is a bit harder to find, but makes for a more powerful ingredient. Gilded Machinery is slightly more powerful, and is almost only ever found in the Nether; finally, Ancient Machinery will be most commonly found in ancient cities, and very rarely through regular archeology in the deepest parts of the world. Ancient Machinery is by far the most powerful, and is practically a requirement to make the most powerful types of machines.
————————–
In addition to Power Cells and Cores, the following new items can be made using the Artificery system:
- The Wrench, which does exactly what you think it does- a simple tool that rotates blocks such as redstone components, hoppers, stairs, patterned blocks, etc. This process can also be automated by putting a wrench in a dispenser. (Just off the top of my head, this could allow for rotating dispensers/pistons, floors with rotating patterns, item sorting systems, etc. They can also be used to heal Iron Golems, or remove power cells from Copper Golems.
- Detectors; (One for each mineral), are tools which emit a pulsing noise based on the player’s proximity to ore blocks. Detectors for rarer minerals, such as Diamond and Netherite, are substantially harder to obtain. The noise varies based on how close you are to the desired material. …Careful though, as armor of the material type, and mobs containing that material, (such as iron golems), can throw off detectors.
- Blasters, basic projectile weapon that uses power cells for ammunition, and fire much more powerfully than a bow. Three different elemental types can be made in addition to the basic Energy Blaster, with varying effects. Each has three levels of increasing power.
- Rails/Throwersare powerful projectile weapons that consume large amounts of ammunition to create a powerful, high-damage blast. There are four varieties; each with two levels; all Rails have three or four powerful shots, and can be charged to perform a single, extra-powerful blast if they’re at full ammo; expending all their remaining power to do so. Each rail has a different special ability, but all of them are liable to inflict a negative consequence on their wielder if they aren’t immediately fired after charging.
- Boostersare a chestwear item that offers double-jump functionality, providing upwards boosts when used in midair. There are three levels, each offering an additional pulse; wearing iron or netherite armor decreases the power of the jump, while using a potion of leaping increases it.
- Catalystsare throwable explosive devices with varying effects; Energy Catalysts damage and knockback everything in an area without dealing damage; Flame Catalysts destroy blocks and start fires; Frost Catalysts freeze things in ice, and Bolt Catalysts shock things in a large radius, disarming enemies, and doing increasing damage based on armor.
- Drills and Saws are more powerful versions of pickaxes and axes respectively, which can consume power cells to more efficiently do the same task- in the case of Saws, rapidly cutting down entire trees, and in the case of drills, rapidly tunneling through larger areas of stone.
——————————
Copper Golems are a new, adorable variety of Golem that can be found naturally in villages; and can be created by the player using a power core and a block of copper. (Villager variants are distinguished by their more oxidized state, and dangling vines.)
- Copper Golems fly around randomly, and target enemies with a laser-projectile attack similar to that of an energy beam. They try to avoid ranged enemies, and are about 50% accurate, give or take.
- The Beam needs to be recharged using either power cells from the player, or a nearby Power Core. (Golems remain powered for about fifteen to twenty minutes.) Unpowered golems are slower and defenseless- you can lead them around using power cells.
- Village Copper Golems come in a weathered variant, and can become hostile towards players when attacked. They do not become unpowered, but also don’t follow players around if they’re holding a power cell. (Unlike regular copper golems.) While they’re great at dealing with simple enemies like creepers and zombies, they’re hard pressed to handle other ranged mobs, such as skeletons and pillagers. (Luckily, they can leave those up to their iron golem companions.) To be clear, these do not currently generate in villages, but will in coming updates.
- Finally, Oxidized Copper Golems can, (or will), be found in various ruined structures, and are hostile exclusively to players and zombies. They’re tougher (and slower) than regular copper golems, and a bit of a nuisance to deal with. Try to take them out from a distance using a ranged weapon with more reach than their energy beam.
OTHER CHANGES
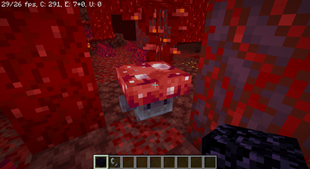
In case you were wondering, here’s the loot tables for every single type of suspicious block: (Bear in mind that blocks of the same material are identical save for their loot tables, and that only the basic loot tables are currently available in survival. Suspicious Gravel also doesn’t yet generate naturally, and will eventually be found around ocean ruins and monuments.)
The system for archeology loot is as follows: A junk item is always produced; a useful item is produced if the block is over halfway excavated, and a special item is only produced if the block is perfectly excavated. (These stack- if you mine it perfectly, you also get the previous drops.) An additional Junk item is produced with a 50% chance for each level of fortune; and an additional useful item is produced with a 50% chance for each level of Fortune if the block is perfectly excavated. Items are listed as follows:
- Item Name ~ Weight (Likelihood of being rolled- higher is better) ~ Other Notes
Suspicious Dirt (Junk)
- Broken Machinery ~ W4
- Emerald ~ W1 ~ Min 1, Max 2
- Iron Nugget ~ W3 ~ Min 1, Max 4
- Raw Copper ~ W2
- Raw Iron ~ W1
- Flint ~ W3
- Wheat Seeds ~ W2
- Potato ~ W2
- Poison Potato ~ W1
- Carrot ~ W2
- Egg ~ W2
- Ceramic Shard ~ W3
- Gold Nugget ~ W1 ~ Min 1, Max 3
- Bone ~ W4 ~ Min 1, Max 3
- Stick ~ W3 ~ Min 1, Max 3
Suspicious Dirt (Useful)
- Broken Machinery ~ W1, ~ Min 1, Max 3
- Ceramic Shard ~ W2
- Yellow Ceramic Shard ~ W1
- Iron Ingot ~ W1
- Copper Ingot ~ W1
- Emerald ~ W1, ~ Min 1, Max 3
- Power Cell ~ W2 ~ Min 1, Max 2
- Empty Bottle ~ W1
- Gold Nugget ~ W1 ~ Min 2, Max 6
Suspicious Dirt (Special)
- Old Machinery ~ W3
- Blue Ceramic Shard ~ W1
- Pink Ceramic Shard ~ W1
- Moog City Disc Fragment ~ W1
- Disc #11 Fragment ~ W1
- Disc #2 Fragment ~ W1
- Broken Machinery ~ W5
- Diamond ~ W3
- Name Tag ~ W3
- Compass ~ W3
- Nautilus Shell ~ W2
- Lighting Fragment ~ W2
- Iron Sword ~ W1 ~ Damaged
- Iron Shovel ~ W1 ~ Damaged
- Iron Axe ~ W1 ~ Damaged
- Iron Hoe ~ W1 ~ Damaged
- Leather Boots ~ W2 ~ Damaged
- Leather Helmet ~ W1 ~ Damaged
- Leather Chestplate ~ W1 ~ Damaged
- Chainmail Helmet ~ W1 ~ Damaged
- Iron Boots ~ W1 ~ Damaged
- Vessel Piece ~ W1
Ancient Dirt (Junk)
- Leather ~ W3
- Bonemeal ~ W3 ~ Min 1, Max 2
- Bone ~ W2 ~ Min 1, Max 3
- Rabbit Hide ~ W3 ~ Min 1, Max 3
- Raw Copper ~ W2
- Ceramic Shard ~ W3
- Stick ~ W3
- Flint ~ W2
- Beetroot Seeds ~ W1
- Wheat Seeds ~ W1
- Brick ~ W3 ~ Min 1, Max 3
- Pumpkin Seeds ~ W1
- Brown Ceramic Shard ~ W1
- Disc #2 Fragment ~ W1
Ancient Dirt (Useful)
- Brown Ceramic Shard ~ W3
- Copper Spear ~ W3
- Weathered Copper Spear ~ W5
- Ceramic Shard ~ W4
- Disc #2 Fragment ~ W3
- Copper Ingot ~ W2
- Lightning Shard ~ W2
- Amethyst Shard ~ W2 ~ Min 1, Max 3
- Prismarine Crystals ~ W1
- Yellow Ceramic Shard ~ W1
- Pink Ceramic Shard ~ W1
- Stone Axe ~ W1 ~ Damaged
- Stone Hoe ~ W1 ~ Damaged
- Leather Boots ~ W1 ~ Damaged
Ancient Dirt (Special)
- Diamond ~ W2
- Oxidized Copper Spear ~ W2
- Weathered Copper Spear ~ W3
- Amethyst Spear ~ W1
- Lightning Spear ~ W1
- Disc #2 Fragment ~ W3
- Brown Ceramic Shard ~ W2 ~ Min 1, Max 3
- Leather Chestplate ~ W1 ~ Damaged
- Leather Leggings ~ W1 ~ Damaged
- Stone Sword ~ W1 ~ Damaged
- Stone Pickaxe ~ W1 ~ Damaged
Lush Dirt (Junk)
- Bamboo ~ W4 ~ Min 1, Max 3
- Redstone Dust ~ W2 ~ Min 2, Max 6
- String ~ W2 ~ Min 1, Max 3
- Feather ~ W2 ~ Min 1, Max 3
- Quartz ~ W1
- Melon Seeds ~ W2
- Wheat Seeds ~ W1
- Stick ~ W1 ~ Min 1, Max 3
- Ceramic Shard ~ W2
- Broken Machinery ~ W3
- Emerald ~ W1 ~ Min 1, Max 2
- Iron Nugget ~ W3 ~ Min 1, Max 4
- Raw Iron ~ W1
- Bone ~ W3 ~ Min 1, Max 3
Lush Dirt (Useful)
- Powercell ~ W3 ~ Min 1, Max 3
- Redstone Torch ~ W1
- Broken Machinery ~ W3 ~ Min 1, Max 3
- Old Machinery ~ W2
- Iron Ingot ~ W3
- Lime Ceramic Shard ~ W2
- Yellow Ceramic Shard ~ W1
- Emerald ~ W1 ~ Min 2, Max 4
- Empty Bottle ~ W1
- Potion of Poison ~ W1
- Potion of Weakness ~ W1
- Splash Potion of Weakness ~ W1
- Arrow ~ W2 ~ Min 1, Max 4
- Poison Arrows ~ W2 ~ Min 1, Max 4
- Weakness Arrows ~ W1 ~ Min 1, Max 4
Lush Dirt (Special)
- Old Machinery ~ W3 ~ Min 1, Max 2
- Power Core ~ W2
- Lime Ceramic Shard ~ W3
- Far Disc Fragment ~ W1
- Blocks Disc Fragment ~ W1
- Broken Machinery ~ W5 ~ Min 1, Max 3
- Diamond ~ W3
- Name Tag ~ W3
- Bow ~ W1 ~ Damaged
- Iron Shovel ~ W1 ~ Damaged
- Iron Axe ~ W1 ~ Damaged
- Iron Hoe ~ W1 ~ Damaged
- Leather Boots ~ W2 ~ Damaged
- Leather Helmet ~ W1 ~ Damaged
- Leather Chestplate ~ W1 ~ Damaged
- Chainmail Helmet ~ W1 ~ Damaged
- Chainmail Boots ~ W1 ~ Damaged
- Splash Potion of Poison ~ W1
Grave Dirt (Junk)
- Bones ~ W3 ~ Min 1, Max 3
- Rotten Flesh ~ W3 ~ Min 1, Max 3
- Golden Nugget ~ W2 ~ Min 1, Max 6
- Iron Nugget ~ W3 ~ Min 1, Max 4
- Ceramic Shard ~ W2 ~ Min 1, Max 3
- White Ceramic Shard ~ W1
- Yellow Ceramic Shard ~ W1
- Magenta Ceramic Shard ~ W1
- Candle ~ W3 ~ Min 1, Max 2
- Bottle o’ Enchanting ~ W4 ~ Min 1, Max 4
Grave Dirt (Useful)
- Yellow Candle ~ W1 ~ Min 1, Max 3
- Magenta Candle ~ W1 ~ Min 1, Max 3
- White Candle ~ W1 ~ Min 1, Max 3
- Black Ceramic Shard ~ W1
- Name Tag ~ W2
- Book ~ W2 ~ Min 1, Max 3
- Small Yellow Pot ~ W1
- Small White Pot ~ W1
- Amethyst Shard ~ W2 ~ Min 1, Max 3
- Poppy ~ W1
- Diamond ~ W1
- Shield ~ W1 ~ Damaged
- Bow ~ W1 ~ Damaged
- Iron Sword ~ W1 ~ Damaged
- Iron Axe ~ W1 ~ Damaged
- Iron Helmet ~ W1 ~ Damaged
- Leather Helmet ~ W1 ~ Damaged
- Leather Chestplate ~ W1 ~ Damaged
- Leather Boots ~ W1 ~ Damaged
Grave Dirt (Special)
- Skull ~ W3
- Disc #2 Fragment ~ W1
- Black Ceramic Shard ~ W2
- Small Magenta Pot ~ W1
- Small White Pot ~ W1
- Tall White Pot ~ W1
- Small Yellow Pot ~ W1
- Tall Yellow Pot ~ W1
- Enchanted Golden Apple ~ W1
- Poppy ~ W1
- Sunflower ~ W2
- Mellohi Disc Fragment ~ W1
- Ward Disc Fragment ~ W1
- Trident ~ W1 ~ Damaged
- Gold Helmet ~ W1 ~ Damaged
- Gold Sword ~ W1 ~ Damaged
- Gold Axe ~ W1 ~ Damaged
- Vessel Piece ~ W2
Town Dirt (Junk)
- Stick ~ W2 ~ Min 1, Max 3
- Broken Machinery ~ W2
- Book ~ W1
- Bones ~ W2 ~ Min 1, Max 3
- Ceramic Shard ~ W2 ~ Min 1, Max 3
- Gold Nugget ~ W1 ~ Min 1, Max 3
- Iron Nugget ~ W2 ~ Min 1, Max 3
- Bowl ~ W1 ~ Min 1, Max 2
- Empty Bottle ~ W2 ~ Min 1, Max 2
- Bottle o’ Enchanting ~ W1 ~ Min 1, Max 2
- Arrow ~ W2 ~ Min 1, Max 5
- White Ceramic Shard ~ W1
- Power Cell ~ W3 ~ Min 1, Max 3
- Splash Potion of Weakness ~ W2
- Arrow of Healing ~ W1 ~ Min 2, Max 4
Town Dirt (Useful)
- Emerald ~ W5 ~ Min 2, Max 7
- White Ceramic Shard ~ W2
- Moog City Disc Fragment ~ W2
- Kyoto Disc Fragment ~ W1
- Gold Apple ~ W3
- Broken Machinery ~ W4 ~ Min 1, Max 3
- Old Machinery ~ W3
- Lapis Lazuli ~ W3 ~ Min 1, Max 3
- Iron Ingot ~ W3 ~ Min 1, Max 3
- Gold Ingot ~ W3 ~ Min 1, Max 3
- Iron Sword ~ W1 ~ Damaged
- Iron Axe ~ W1 ~ Damaged
- Iron Sword ~ W1 ~ Damaged ~ Randomly Enchanted
- Iron Sword ~ W1 ~Damaged ~ Randomly Enchanted
- Iron Helmet ~ W2 ~ 30 to 90% Broken
- Iron Chestplate ~ W1 ~ 30 to 90% Broken
- Shield ~ W3 ~ 30 to 90% Broken
- Crossbow ~ W4 ~ 30 to 90% Broken
- Enchanted Book of Smite ~ W1
- Enchanted Book of Blast Protection ~ W1
- Enchanted Book of Protection ~ W1
- Splash Potion of Healing ~ W3
- Potion of Healing ~ W3
Town Dirt (Special)
- Power Core ~ W1
- Gilded Machinery ~ W1
- Diamond ~ W2
- Chainmail Helmet ~ W2 ~ Damaged ~ Randomly Enchanted
- Chainmail Chestplate ~ W1 ~ Damaged ~ Randomly Enchanted
- Chainmail Leggings ~ W2 ~ Damaged
- Gold Helmet ~ W1 ~ Damaged ~ Randomly Enchanted
- Gold Chestplate ~ W1 ~ Damaged ~ Randomly Enchanted
- Gold Boots ~ W1 ~ Damaged ~ Randomly Enchanted
- Golden Sword ~ W3 ~ Damaged ~ Randomly Enchanted
- Bow ~ W2 ~ Damaged ~ Randomly Enchanted
- Enchanted Book of Smite ~ W1
- Enchanted Book of Blast Protection ~ W2
- Enchanted Book of Sharpness ~ W3
- Potion of Regeneration ~ W2
- Vessel Piece ~ W1
Suspicious Netherrack (Junk)
- Gold Nugget ~ W3 ~ Min 1, Max 3
- Fire Charge ~ W3
- Iron Nugget ~ W3 ~ Min 1, Max 3
- Ghast Tear ~ W1
- Empty Bottle ~ W2
- Flint ~ W1
- Crimson Roots ~ W3
- Warped Roots ~ W3
- Warped Fungus ~ W2 ~ Min 1, Max 3
- Crimson Fungus ~ W2 ~ Min 1, Max 3
- Bone ~ W2 ~ Min 1, Max 4
- Rotten Flesh ~ W4 ~ Min 1, Max 4
- Quartz ~ W1 ~ Min 1, Max 3
- Bottle o’ Enchanting ~ W2
- Broken Machinery ~ W2 ~ Min 1, Max 3
- Gilded Machinery ~ W4
- Raw Gold ~ W2
- Red Ceramic Shard ~ W5
- Dark Gray Ceramic Shard ~ W1
Suspicious Netherrack (Useful)
- Gold Ingot ~ W2
- Fire Charge ~ W2
- Power Cell ~ W4 ~ Min 1, Max 3
- Iron Ingot ~ W1
- Large Geode ~ W1
- Large Quartz Geode ~ W2
- Large Gold Geode ~ W1
- Netherite Scrap ~ W1
- Pigstep Disc Fragment ~ W1
- Gilded Machinery ~ W3 ~ Min 1, Max 2
- Potion of Fire Resistance ~ W1
- Potion of Strength ~ W1
- Golden Sword ~ W1 ~ Damaged
- Iron Sword ~ W1 ~ Damaged
- Crossbow ~ W2 ~ Damaged
- Shield ~ W2 ~ Damaged
Suspicious Netherrack (Special)
- Pigstep Disc Fragment ~ W2
- Diamond ~ W3
- Bottle o’ Enchanting ~ W1 ~ Min 1, Max 3
- Old Machinery ~ W3
- Gilded Machinery ~ W2 ~ Min 1, Max 2
- Power Core ~ W3
- Golden Sword ~ W1 ~ Damaged ~ Randomly Enchanted
- Golden Axe ~ W1 ~ Damaged ~ Randomly Enchanted
- Golden Helmet ~ W1 ~ Damaged ~ Randomly Enchanted
- Golden Chestplate ~ W1 ~ Damaged ~ Randomly enchanted.
- Golden Boots ~ W1 ~ Damaged ~ Randomly enchanted.
- Iron Boots ~ W1 ~ Damaged
- Iron Helmet ~ W1 ~ Damaged
- Iron Leggings ~ W1 ~ Damaged
- Potion of Regeneration ~ W1
- Potion of Healing ~ W1
- Potion of Fire Resistance ~ W1
- Vessel Piece ~ W1
Fortress Netherrack (Junk)
- Gold Nugget ~ W3 ~ Min 1, Max 4
- Iron Nugget ~ W3 ~ Min 1, Max 4
- Blaze Powder ~ W2 ~ Min 1, Max 3
- Bone ~ W3 ~ Min 1, Max 4
- Charcoal ~ W4 ~ Min 1, Max 3
- Rotten Flesh ~ W4 ~ Min 1, Max 4
- Gilded Machinery ~ W3
- Broken Machinery ~ W4 ~ Min 1, Max 4
- Empty Bottle ~ W4
- Magma Cream ~ W3
- Blaze Rod ~ W1
- Fire Charge ~ W1
- Spectral Arrows ~ W5 ~ Min 1, Max 5
- Red Ceramic Shard ~ W5 ~ Min 1, Max 2
- Gray Ceramic Shard ~ W3 ~ Min 1, Max 2
Fortress Netherrack (Useful)
- Gilded Machinery ~ W4
- Gold Ingot ~ W3 ~ Min 1, Max 3
- Golden Carrot ~ W3 ~ Min 1, Max 4
- Golden Apple ~ W3
- Crossbow ~ W4 ~ Damaged
- Shield ~ W4 ~ Damaged
- Gold Sword ~ W1 ~ Damaged ~ Randomly Enchanted
- Arrows of Harming ~ W4 ~ Min 1, Max 5
- Potion of Regeneration ~ W1
- Potion of Healing ~ W1
- Potion of Strength ~ W1
- Potion of Fire Resistance ~ W1
- Splash Potion of Fire Resistance ~ W1
- Splash Potion of Healing ~ W1
- Lapis Lazuli ~ W3
- Vessel Piece ~ W3
Fortress Netherrack (Special)
- Wither Skull ~ W1
- Diamond ~ W4
- Black Ceramic Shard ~ W1
- Magenta Ceramic Shard ~ W2
- Red Ceramic Shard ~ W3 ~ Min 1, Max 3
- Pigstep Disc Fragment ~ W2
- Netherite Scrap ~ W3 ~ Min 1, Max 2
- Bottle O’ Enchanting ~ W3 ~ Min 2, Max 4
- Golden Horse Armor ~ W3
- Enchanted Golden Apple ~ W1
- Golden Helmet ~ W1 ~ Randomly Enchanted ~ Damaged
- Golden Chestplate ~ W1 ~ Randomly Enchanted ~ Damaged
- Golden Leggings ~ W1 ~ Randomly Enchanted ~ Damaged
- Golden Boots ~ W1 ~ Randomly Enchanted ~ Damaged
- Chainmail Chestplate ~ W1 ~ Damaged
- Chainmail Leggings ~ W1 ~ Damaged
- Iron Helmet ~ W2 ~ Damaged
- Golden Axe ~ W1 ~ Damaged ~ Randomly Enchanted
Suspicious Stone (Junk)
- Iron Nugget ~ W4 ~ Min 1, Max 4
- Gold Nugget ~ W3 ~ Min 1, Max 4
- Raw Iron ~ W3
- Raw Copper ~ W3
- Small Geode ~ W5
- Flint ~ W3
- Broken Machinery ~ W3
- Light Gray Ceramic Shard ~ W3
- Bonemeal ~ W3 ~ Min 1, Max 3
- Torch ~ W2
- Spider Eyeball ~ W1
- Amethyst Shard ~ W2 ~ Min 1, Max 3
- Redstone Dust ~ W2
Suspicious Stone (Useful)
- Small Geode ~ W3
- Raw Gold ~ W2
- Raw Iron ~ W2 ~ Min 1, Max 3
- Glow Berries ~ W2 ~ Min 1, Max 3
- Light Gray Ceramic Shard ~ W1
- Old Machinery ~ W3
- Broken Machinery ~ W2 ~ Min 1, Max 3
- Quartz ~ W3
- Lantern ~ W3
- Emerald ~ W1 ~ Min 1, Max 3
- Power Cell ~ W3
Suspicious Stone (Special)
- Large Geode ~ W3
- Diamond ~ W3
- Old Machinery ~ W6
- Bottle o’ Enchanting ~ W3
- Iron Pickaxe ~ W1 ~ Damaged
- Iron Sword ~ W1 ~ Damaged
- Iron Chestplate ~ W1 ~ Damaged
- Iron Helmet ~ W1 ~ Damaged
- Chainmail Chestplate ~ W1 ~ Damaged
- Chainmail Helmet ~ W1 ~ Damaged
- Disc Fragment 11 ~ W1
- Disc Fragment 13 ~ W1
Miner Stone (Junk)
- Coal ~ W3
- Bones ~ W3 ~ Min 1, Max 4
- Raw Iron ~ W1
- Raw Copper ~ W2
- Raw Gold ~ W1
- Bowl ~ W2
- Gold Nugget ~ W2 ~ Min 1, Max 3
- Stick ~ W2 ~ Min 1, Max 3
- Torch ~ W3
- Lantern ~ W2
- Iron Nugget ~ W2 ~ Min 1, Max 4
- Power Cell ~ W5 ~ Min 1, Max 3
- Chain ~ W2 ~ Min 1, Max 3
- Broken Machinery ~ W5
- Iron Pickaxe ~ W1 ~ Damaged
Miner Stone (Useful)
- Old Machinery ~ W4 ~ Min 1, Max 2
- Light Gray Ceramic Shard ~ W2
- Lime Ceramic Shard ~ W1
- Empty Bottle ~ W2
- Bottle o’ Enchanting ~ W3 ~ Min 1, Max 3
- Broken Machinery ~ W4 ~ Min 1, Max 3
- Gold Ingot ~ W1
- Iron Ingot ~ W1
- Copper Ingot ~ W2
- Iron Chestplate ~ W1 ~ Damaged
- Iron Pickaxe ~ W1 ~ Damaged
- Iron Helmet ~ W2 ~Damaged
- Iron Boots ~ W1 ~ Damaged
- Leather Boots ~ W1 ~ Damaged
- Potion of Night Vision ~ W1
- Potion of Healing ~ W1
Miner Stone (Special)
- Old Machinery ~ W3
- Diamond ~ W4
- Gilded Machinery ~ W2
- Power Core ~ W2
- Disc Fragment 11 ~ W1
- Disc Fragment 13 ~ W1
- Netherite Scrap ~ W1
- Golden Apple ~ W3
- Gold Pickaxe ~ W1 ~ Randomly Enchanted ~ Damaged
- Gold Helmet ~ W1 ~ Randomly Enchanted ~ Damaged
- Golden Boots ~ W1 ~ Randomly Enchanted ~ Damaged
- Chainmail Chestplate ~ Damaged
- Book of Efficiency ~ W1
- Book of Fortune ~ W1
- Book of Unbreaking ~ W2
Suspicious Sand (Junk)
- Gold Nugget ~ W6 ~ Min 1, Max 4
- Stick ~ W2 ~ Min 1, Max 3
- Blue Ceramic Shard ~ W2
- Bonemeal ~ W2
- Raw Copper ~ W2
- Raw Gold ~ W1
- Dried Kelp ~ W2 ~ Min 1, Max 3
- Prismarine Shard ~ W1
- Sugar Cane ~ W2 ~ Min 1, Max 3
- Iron Nugget ~ W2 ~ Min 1, Max 3
- String ~ W3 ~ Min 1, Max 2
Suspicious Sand (Useful)
- Emerald ~ W3 ~ Min 1, Max 3
- Copper Ingot ~ W3
- Prismarine Crystals ~ W2 ~ Min 1, Max 3
- Sea Pickle ~ W3 ~ Min 1, Max 4
- Gold Ingot ~ W2
- Empty Bottle ~ W3
- Bucket ~ W2
- Broken Machinery ~ W2
- Blue Ceramic Shard ~ W2
- Light Blue Ceramic Shard ~ W2
- Fishing Rod ~ W3 ~ Damaged
- Wooden Shovel ~ W2 ~ Damaged
Suspicious Sand (Special)
- Far Disc Fragment ~ W2
- Turtle Scute ~ W4 ~ Min 1, Max 3
- Compass ~ W1
- Light Blue Ceramic Shard ~ W2
- Diamond ~ W2
- Nautilus Shell ~ W3
- Pufferfish ~ W1
- Lapis Lazuli ~ W3 ~ Min 1, Max 3
- Old Machinery ~ W3
- Emerald ~ W3 ~ Min 2, Max 5
- Golden Apple ~ W2
- Enchanted Book of Aqua Affinity ~ W1
- Enchanted Book of Unbreaking ~ W2
- Potion of Water Breathing ~ W2
- Potion of Night Vision ~ W2
- Gold Helmet ~ W1 ~ Randomly Enchanted ~ Damaged
- Leather Leggings ~ W2 ~ Damaged
- Leather Boots ~ W2 ~ Damaged
- Fishing Rod ~ W2 ~ Damaged ~ Randomly Enchanted
Pyramid Sand (Junk)
- Gunpowder ~ W4 ~ Min 1, Max 3
- Cactus Green ~ W2 ~ Min 1, Max 2
- Gold Nugget ~ W3 ~ Min 1, Max 3
- Lapis Lazuli ~ W2 ~ Min 1, max 3
- Ceramic Shard ~ W4
- Flint ~ W2
- Green Ceramic Shard ~ W2
- Empty Bottle ~ W2
- Bowl ~ W1
- Stick ~ W2 ~ Min 1, Max 2
- Bone ~ W4 ~ Min 1, Max 3
- Bottle o’ Enchanting ~ W1 ~ Min 1, Max 3
Pyramid Sand (Useful)
- Porcelain Tile ~ W5 ~ Min 1, Max 3
- Emerald ~ W3 ~ Min 2, Max 4
- Book ~ W3 ~ Min 1, Max 3
- Firework Charge ~ W2
- Gold Ingot ~ W3
- Broken Machinery ~ W4
- Green Ceramic Shard ~ W3
- Amethyst Shard ~ W3 ~ Min 1, Max 4
- Prismarine Crystals ~ W1 ~ Min 1, Max 3
- Leather Helmet ~ W1 ~ Damaged
- Leather Boots ~ W1 ~ Damaged
- Leather Leggings ~ W1 ~ Damaged
Pyramid Sand (Special)
- Magenta Ceramic Shard ~ W3
- Emerald ~ W3 ~ Min 2, Max 4
- Nautilus Shell ~ W1
- Diamond ~ W2
- Green Ceramic Shard ~ W3
- Chirp Disc Fragment ~ W1
- Mellohi Disc Fragment ~ W1
- Bottle o’ Enchanting ~ W2 ~ Min 1, Max 4
- Amethyst Spear ~ W1
- Golden Sword ~ W1 ~ Randomly Enchanted ~ Damaged
- Golden Hoe ~ W1 ~ Randomly Enchanted ~ Damaged
- Golden Helmet ~ W1 ~ Randomly Enchanted ~ Damaged
- Golden Boots ~ W1 ~ Randomly Enchanted ~ Damaged
- Chainmail Chestplate ~ W1 ~ Damaged
- Enchanted Book of Fire Aspect ~ W1
- Enchanted Book of Mending ~ W1
- Enchanted Book of Blast Protection ~ W2
- Enchanted Book of Flame ~ W1
- Enchanted Book ~ W2 ~ Randomly Enchanted
- Golden Apple ~ W3
- Enchanted Golden Apple ~ W1
Suspicious Gravel (Junk)
- Prismarine Shard ~ W5 ~ Min 1, Max 3
- Prismarine Crystals ~ W3 ~ Min 1, Max 3
- Raw Copper ~ W4
- Copper Ingot ~ W2
- Gold Nugget ~ W3 ~ Min 1, Max 4
- Raw Gold ~ W2
- Empty Bottle ~ W1
- Bottle o’ Enchanting ~ W2
- Broken Machinery ~ W3
- String ~ W2 ~ Min 1, Max 3
- Bones ~ W3 ~ Min 1, Max 3
- Emerald ~ W3 ~ Min 1, Max 3
- Blue Ceramic Shard ~ W1
- Light Blue Ceramic Shard ~ W3
Suspicious Gravel (Useful)
- Light Blue Ceramic Shard ~ W2
- Moog City Disc Fragment ~W1
- Copper Ingot ~ W4
- Gold Ingot ~ W3
- Broken Machinery ~ W3 ~ Min 1, Max 3
- Old Machinery ~ W4
- Power Cell ~ W3 ~ Min 1, Max 3
- Emerald ~ W2 ~ Min 1, Max 4
- Bottle o’ Enchanting ~ W2 ~ Min 1, Max 3
- Book ~ W3 ~ Min 1, Max 2
- Nautilus Shell ~ W1
- Potion of Water Breathing ~ W1
- Potion of Night Vision ~ W1
- Potion of Speed ~ W1
Suspicious Gravel (Special)
- Black Ceramic Shard ~ W2
- Wait Disc Fragment ~ W1
- Kyoto Disc Fragment ~ W1
- Diamond ~ W3
- Old Machinery ~ W4
- Golden Apple ~ W3
- Enchanted Golden Apple ~ W1
- Trident ~ W1 ~ Damaged
- Oxidized Copper Spear ~ W2
- Weathered Copper Spear ~ W1
- Heart of the Sea ~ W1
- Gold Helmet ~ W1 ~ Randomly Enchanted ~ Damaged
- Gold Chestplate ~ W1 ~ Randomly Enchanted ~ Damaged
- Gold Boots ~ W1 ~ Randomly Enchanted ~ Damaged
- Bow ~ W1 ~ Randomly Enchanted ~ Damaged
- Chainmail Chestplate ~ W1 ~ Damaged
- Chainmail Leggings ~ W1 ~ Damaged
- Enchanted Book of Depth Strider ~ W2
- Enchanted Book of Aqua Affinity ~ W1
- Random Enchanted Book ~ W1
Suspicious Deepslate (Junk)
- Old Machinery ~ W4
- Geode ~ W3 ~ Min 1, Max 3
- Large Geode ~ W4
- Raw Gold ~ W2
- Raw Iron ~ W2
- Soul Torch ~ W1
- Empty Bottle ~ W2
- Quartz ~ W3
- Power Cell ~ W3
- Bottle O’ Enchanting ~ W2
- Black Ceramic Shard ~ W2
- Cyan Ceramic Shard ~ W1
- White Ceramic Shard ~ W1
Suspicious Deepslate (Useful)
- Disc #13 Fragment ~ W1
- Ancient Machinery ~ W4
- Old Machinery ~ W2, Min 1, Max 2
- Golden Apple ~ W2
- Spectral Arrows ~ W3 ~ Min 1, Max 4
- Soul Lantern ~ W1
- Diamond ~ W1
- Name Tag ~ W2
- Amethyst Shard ~ W3 ~ Min 1, Max 3
- Potion of Night Vision ~ W1
- Potion of Healing ~ W1
- Glowstone Dust ~ W2 ~ Min 1, Max 3
Suspicious Deepslate (Special)
- Diamond ~ W2
- Ancient Machinery ~ W5
- Disc #11 Fragment ~ W1
- Netherite Scrap ~ W1
- Black Ceramic Shard ~ W1 ~ Min 1, Max 3
- Cyan Ceramic Shard ~ W1
- Chainmail Helmet ~ W1 ~ Damaged
- Diamond Sword ~ W1 ~ Damaged
- Diamond Pickaxe ~ W1 ~ Damaged
- Golden Sword ~ W1 ~ Randomly Enchanted ~ Damaged
- Golden Pickaxe ~ W1 ~ Randomly Enchanted ~ Damaged
- Golden Helmet ~ W1 ~ Randomly Enchanted ~ Damaged
- Golden Chestplate ~ W1 ~ Randomly Enchanted ~ Damaged
- Golden Boots ~ W1 ~ Randomly Enchanted ~ Damaged
- Diamond Boots ~ W1 ~ Damaged
City Deepslate (Junk)
- Old Machinery ~ W3
- Bottle O’ Enchanting ~ W3 ~ Min 1, Max 3
- Soul Torch ~ W3
- Soul Lantern ~ W3
- Book ~ W4 ~ Min 1, Max 3
- Candle ~ W2 ~ Min 1, Max 3
- White Candle ~ W2 ~ Min 1, Max 3
- Echo Shard ~ W4
- Empty Bottle ~ W3 ~ Min 1, Max 3
- Bowl ~ W2
- Wither Rose ~ W1
- Ancient Machinery ~ W1
- Disc #5 Fragment ~ W3
- Cyan Ceramic Shard ~ W5
- Black Ceramic Shard ~ W3
City Deepslate (Useful)
- Ancient Machinery ~ W2
- Old Machinery ~ W4 ~ Min 1, Max 3
- Diamond ~ W3
- Black Ceramic Shard ~ W2
- Ender Pearl ~ W3
- Blaze Powder ~ W1
- Lapis Lazuli ~ W2 ~ Min 1, Max 3
- Amethyst Shard ~ W2 ~ Min 1, Max 3
- Enchanted Book of Swift-Sneak ~ W1
- Enchanted Book of Protection ~ W1
- Random Enchanted Book ~ W1
City Deepslate (Special)
- Eye of Ender ~ W2
- Disc #5 Fragment ~ W1
- Diamond ~ W3
- Netherite Scrap ~ W2
- Recovery Compass ~ W2
- Diamond Sword ~ W1 ~ Damaged
- Diamond Hoe ~ W1 ~ Damaged
- Diamond Helmet ~ W1 ~ Damaged
- Diamond Boots ~ W1 ~ Damaged
- Diamond Axe ~ W1 ~ Damaged
A more thorough explanation of all of the different artificery gadgets, their properties, statistics, etc:
Energy Blasters have the following properties:
Energy Blaster M1
- Ammunition ~ 10
- Cooldown ~ 0.75 Seconds
- Damage ~ About 3.5 Hearts
- Range ~ 15 Meters
- Knockback ~ None
- Effects ~ None
Energy Blaster M2
- Ammunition ~ 12
- Cooldown ~ 0.6 Seconds
- Damage ~ About 4.5 Hearts
- Range ~ 20 Meters
- Knockback ~ None
- Effects ~ None
Energy Blaster M3
- Ammunition ~ 14
- Cooldown ~ 0.5 Seconds
- Damage ~ About 6 Hearts
- Range ~ 25 Meters
- Knockback ~ None
- Effects ~ None
Flame Blaster M1
- Ammunition ~ 8
- Cooldown ~ 0.8 Seconds
- Damage ~ About 3 Hearts
- Range ~ 10 Meters
- Knockback ~ 1
- Effects ~ Ignites Target for 3-5 Seconds; 50% chance of starting a single fire when impacting a block. (With ‘Ashen Remains’ installed, can start eternal or regular fires on impact.)
Flame Blaster M2
- Ammunition ~ 10
- Cooldown ~ 0.6 Seconds
- Damage ~ About 4 Hearts
- Range ~ 15 Meters
- Knockback ~ 1
- Effects ~ Ignites target for 5-7 seconds on impact; can start up to five fires at random when hitting a block.
Flame Blaster M3
- Ammunition ~ 12
- Cooldown ~ 0.5 Seconds
- Damage ~ About 5 Hearts
- Range ~ 20 Meters
- Knockback ~ 2
- Kickback ~ 1
- Effects ~ Ignites target for 7-12 seconds; can start up to nine fires at random when hitting a block.
Bolt Blaster M1
- Ammunition ~ 8
- Cooldown ~ 0.8 Seconds
- Damage ~ None; deals 1 hearts of damage per article of gold or netherite armor, and +2 hearts of damage per article of chainmail or iron armor. Damages armor regardless of type; deals 2 damage to each piece.
- Range ~ 15 Meters
- Knockback ~ 1
- Kickback ~ 1
- Effects ~ Causes held items to drop; with a 50% chance of dropping the item in main hand, and a 25% chance of dropping the item in the off-hand.
Bolt Blaster M2
- Ammunition ~ 10
- Cooldown ~ 0.6 Seconds
- Damage ~ 1 Base damage; deals +1 hearts of damage per article of gold or netherite armor, and +2 heart of damage per article of chainmail or iron armor. Damages armor regardless of type; deals 4 damage to each piece.
- Range ~ 20 Meters
- Knockback ~ 2
- Kickback ~ 1
- Effects ~ Causes held items to drop; with a 75% chance of dropping the item in main hand, and a 50% chance of dropping the item in the off-hand.
Bolt Blaster M3
- Ammunition ~ 12
- Cooldown ~ 0.4 Seconds
- Damage ~ 2 Base damage; deals +2 hearts of damage per article of gold or netherite armor, and +3 heart of damage per article of chainmail or iron armor. Damages armor regardless of type; deals 6 damage to each piece.
- Range ~ 30 Meters
- Knockback ~ 3
- Kickback ~ 2
- Effects ~ Stuns target- causes held items in the mainhand to drop, and has a 75% chance of doing the same for the offhand;
Frost Blaster M1
- Ammunition ~ 8
- Cooldown ~ 0.8 Seconds
- Damage ~ 2 Base damage; deals additional damage to blazes, magma-cubes, wither skeletons, striders, and piglins.
- Range ~ 20 Meters
- Knockback ~ 1
- Kickback ~ 1
- Effects ~ Inflicts a brief but powerful slowness effect on target for 1-3 seconds, and extinguishes target; duration is doubled for hot entities, or entities equipped with Netherite. Can freeze water-blocks into ice. (This change wears off after 5 seconds.)
Frost Blaster M2
- Ammunition ~ 10
- Cooldown ~ 0.6 Seconds
- Damage ~ 4 Base damage; deals additional damage to blazes, magma-cubes, wither skeletons, striders, and piglins.
- Range ~ 30 Meters
- Knockback ~ 1
- Effects ~ Inflicts a brief but powerful slowness effect on target for 3-6 seconds, and extinguishes target; duration is doubled for hot entities, or entities equipped with Netherite. Can freeze multiple water-blocks into ice. (This change wears off after 10 seconds.)
Frost Blaster M3
- Ammunition ~ 12
- Cooldown ~ 0.4 Seconds
- Damage ~ 6 Base damage; deals additional damage to blazes, magma-cubes, wither skeletons, striders, and piglins.
- Range ~ 40 Meters
- Knockback ~ 2
- Kickback ~ 1
- Effects ~ Inflicts a brief but powerful slowness effect on target for 9-12 seconds, and extinguishes target; duration is doubled for hot entities, or entities equipped with Netherite. Generates ice on impact when air or water is available; process wears off after about ten seconds.
Energy Rails have the following properties:
Energy Rail M1
- Ammunition ~ 3
- Cooldown ~ 2.5 Seconds
- Damage ~ About 7 Hearts
- Range ~ Unlimited
- Knockback ~ 2
- Kickback ~ 1
- Effects ~ Fully charge to launch a non-destructive explosive attack with increased speed. This requires (and expends) all three shots, cools down the item for 10 seconds, and explodes in your face if you don’t fire within 6 seconds of charging.
Energy Rail M2
- Ammunition ~ 4
- Cooldown ~ 2 Seconds
- Damage ~ About 10 Hearts
- Range ~ Unlimited
- Knockback ~ 3
- Kickback ~ 2
- Effects ~ Fully charge to launch a non-destructive, more powerful explosive attack with increased speed. This requires (and expends) all four shots, cools down the item for 8 seconds, and explodes in your face if you don’t fire within 6 seconds of charging.
Flame Thrower M1
- Ammunition ~ 3
- Cooldown ~ 3 Seconds
- Damage ~ About 4 Hearts
- Range ~ Unlimited
- Knockback ~ 2
- Kickback ~ 2
- Effects ~ Ignites All Targets within a 4 block radius of impact for six to twelve seconds, and starts fires at the same rate as the Flame Blaster III. Charge to perform a highly destructive explosive attack that randomly starts fires. (Just definitely don’t hang onto it for too long when fully charged.)
Flame Thrower M2
- Ammunition ~ 4
- Cooldown ~ 2.5 Seconds
- Damage ~ About 6 Hearts
- Range ~ Unlimited
- Knockback ~ 3
- Kickback ~ 2
- Effects ~ Ignites All Targets within a 6 block radius of impact for 10 to 22 seconds, and starts fires at the same rate as the Flame Blaster III. Charge to perform an even more destructive explosive attack that randomly starts fires.
Frost Thrower M1
- Ammunition ~ 3
- Cooldown ~ 3 Seconds
- Damage ~ About 5 Hearts
- Range ~ Unlimited
- Knockback ~ 2
- Kickback ~ 1
- Effects ~ Extinguishes all targets and fires in a 6 block radius, inflicts slowness III for twelve to twenty four seconds on targets; and freezes water on impact. Charge to perform an even more powerful attack that creates an orb of ice on impact; in water or air, which takes about a minute to fully disintegrate.
Frost Thrower M2
- Ammunition ~ 4
- Cooldown ~ 2 Seconds
- Damage ~ About 6 Hearts
- Range ~ Unlimited
- Knockback ~ 2
- Kickback ~ Extreme
- Effects ~ Extinguishes all targets and fires in an 8 block radius, inflicts slowness III for twenty to thirty seconds on targets; and freezes water on impact. Charge to perform an even more powerful attack that creates an even bigger orb of ice on impact; in water or air, which takes about a minute to disintegrate.
Bolt Thrower M1
- Ammunition ~ 3; Unlimited in rainy or stormy weather
- Cooldown ~ 5 Seconds
- Damage ~ About 1 Hearts; deals additional damage based on armor; and damages armor slots.
- Range ~ Unlimited
- Knockback ~ Extreme
- Kickback ~ 2
- Effects ~ In stormy or rainy weather, the Bolt Thrower can be charged, summoning lightning on the player, and launching a projectile that does even more powerful knockback, launches its target into the air, and summons lightning on impact. Deals 10 damage to all armor slots.
Bolt Thrower M2
- Ammunition ~ 4; Unlimited in rainy or stormy weather
- Cooldown ~ 6 Seconds
- Damage ~ About 2 Hearts; Deals additional damage based on armor; and damages armor slots.
- Range ~ Unlimited
- Knockback ~ 5
- Kickback ~ Extreme
- Effects ~ In stormy or rainy weather, the Bolt Thrower can be charged, summoning lightning on the player, and launching a projectile that does even more powerful knockback, launches its target even higher into the air, and summons several bolts lightning on impact. Deals 20 damage to all armor slots.
Ore Detectors have the following properties:
- All detectors beep once if there is a success within 9 blocks of the player, and make a prolonged beep if the success is within four blocks.
- Copper Detectors detect all copper-based blocks, power cores, copper ore, and copper golems.
- Iron Ore Detectors detect all iron ore, power cores, any blocks with iron in their recipe, iron golems, and entities wearing iron or chainmail armor.
- Gold Ore Detectors detect all gold ore, gold blocks such as bells, piglins, and entities wearing gold armor.
- Emerald, Lapis, Quartz, and Diamond ore Detectors are fairly similar; Emerald detectors can detect villagers, Lapis Detectors can detect illagers and entities with enchanted armor, and Diamond detectors can detect enchanting tables and juke boxes.
- Netherite Detectors detect netherite blocks, lodestones, ancient debris, and entities wearing netherite armor. They do not burn in fire or lava.
Power Tools have the following properties:
- The basic Power Saw mines its target block and two additional blocks on each side. It has 100 uses or so.
- The basic power drill mines its target block and one adjacent block side; it expands in a plus/square shaped pattern. It also has about 100 uses.
- Each additional level increases the efficency of the tool, increases its range by +1 block, and increases its uses by +30.
Catalysts have the following properties:
- Normal catalysts stick to whatever surface they hit, and create a non-damaging explosion with the power of a creeper about 1.5 seconds after hitting; they explode immediately on contact with an entity that isn’t blocking.
- Frost Catalysts have the same effect as the Frost Rail on impact, whereas Flame Catalysts have the same effect as the Flame Thrower. (Giant ice bubble and fiery explosion respectively.)
- Thunder Catalysts technically exist, but are still somewhat buggy, and thus not obtainable in survival mode. Their intended purpose is to launch entities backwards with powerful knockback, but they currently do not work on players, and aren’t generating particles properly. They can still be obtained with commands, and may be added in a future update.
Copper Pipesare a new block intended to be used alongside hoppers- they can carry single items in a very similar manner, and can even move things directly upwards- however, they cannot turn corners, or fill/empty containers, with the exception of hoppers. These are intended to enhance hoppers, rather than replace them. (And make it so you don’t, say, need boatloads of iron to move some items twenty blocks.) Copper Pipes interact with comparators, though they always emit either a single or fifteen strength signal. (It’s also handy if you have a wrench on hand to make sure they’re facing the right direction.
- Pipes always move items in the direction they’re pointing if possible, and only if the pipe there is facing the same direction, and isn’t currently holding something. They do this every five ticks.
- A pipe can be filled with up to 64 items from a hopper, but pipes will normally only hold a single item in other circumstances- they only transfer nonstackable items, blocks, and items that stack to 16 into hoppers if there is space available; in short, pipes can transfer any items, but only add items that stack to 64 into slots of a hopper that already contain items. (Put even more bluntly, they get clogged easily by larger items.)
- Pipes can be waterlogged, and drop their contents when broken.
- Six Copper ingots produce four copper pipes in a crafting table.
——————————–
Black dye now exclusively requires wither roses to craft, making it by far the hardest to obtain dye in the game, and making black items more valuable. (This isn’t nearly as annoying if you have ‘Mindthemood’s Pile of Rocks,’ which, in addition to enhancing every single biome in the game, adds wither roses to Soul Sand Valleys.)
- Squid Ink now produces Dark Gray dye.
- Sea Pickles can now produce Lime dye.
- Glow Ink can now be used to produce Cyan dye, finally giving it something useful to do.
——————————–
Broken Iron Golems are a new, weaker, hostile variety of iron golem that will eventually be found in ruins and whatnot. As an attack, they emit a powerful burst of energy that ignites nearby blocks.
——————————
Lightning Bolts deal additional damage based on the armor the victim is wearing- gold and netherite are moderately conductive, whereas iron and chainmail armor can greatly multiply the force of a lightning bolt’s attack. (In short, DO NOT try to fire a Bolt Thrower M2 while wearing a full set of iron armor, unless you want to be killed of electrocution.) Iron Golems die instantly from lightning.
—————–
TECHNICAL JUNK (ARCHEOLOGY LOOT TABLES)
TECHNICAL JUNK (ARTIFICERY GADGETS)
TECHNICAL JUNK (ARTIFICERY TABLE)
The artificery table decides what products to create using the following system, performing these steps in the following order when the player presses the button:
- Check that there are three items in the input slot.
- Check that each ingredient in the three input slots is a valid artificery ingredient, and that there is at least one piece of machinery out of the three ingredient slots.
- Check that there isn’t more than one ‘special’ ingredient. (Fire Charges, Frost Charges, Lightning Charges, Power Cores, and Power Cells)
Add up the point value of the ingredients. Each valid ingredient has the following point value:
- Copper Ingot ~ 1 Point
- Iron Ingot ~ 2 Points
- Gold Ingot ~ 3 Points
- Redstone Dust ~ 2 Points
- Diamond ~ 8 Points
- Netherite Ingot ~ 12 Points
- Broken Machinery ~ 5 Points
- Old Machinery ~ 10 Points
- Gilded Machinery ~ 11 Points
- Ancient Machinery ~ 16 Points
- Power Cell ~ 6 Points
- Power Core ~ 12 Points
- Fire/Frost/Lightning Charge ~ 6 Points
Based on the number of Points, and special ingredients, (if any), the loot table for the output slots is selected. A slot rerolls if it chooses an item selected by the previous slot.
1-12 Points (1 EXP Level Required)
- Power Cell (W5) (Only without specials)
- Wrench (W2)
- Clock (W2)
- Compass (W1)
- Energy Catalyst (W2) (Elemental if a special ingredient is used.)
- Copper Ore Detector (W4)
- Iron Ore Detector (W3)
- Redstone Ore Detector (W3)
- Quartz Ore Detector (W2)
- Energy Blaster M1 (W1) (Elemental if a special ingredient is used.)
- Power Core (W1) (Only without specials)
13-20 Points (2 EXP Levels Required)
- Energy Catalyst (W5) (Elemental if a special ingredient is used.)
- Booster M1 (W2)
- Gold Ore Detector (W1)
- Lapis Ore Detector (W1)
- Redstone Ore Detector (W1)
- Emerald Ore Detector (W1)
- Energy Blaster M1 (W3) (Elemental if a special ingredient is used.)
- Power Drill (W2)
- Power Saw (W2)
- Energy Rail (W1)
- Power Core (W3) (Only without specials)
21-32 Points (4 EXP Levels Required)
- Booster M2 (W3)
- Booster M1 (W1)
- Diamond Ore Detector (W2)
- Gold Ore Detector (W1)
- Energy Catalyst (W2) (Elemental if a special ingredient is used)
- Energy Blaster (W1) (Elemental if a special ingredient is used)
- Energy Blaster M2 (W3) (Elemental if a special ingredient is used.)
- Energy Rail (W3) (Elemental if a special ingredient is used.)
- Power Drill M2 (W2)
- Power Saw M2 (W2)
33+ Points (8 EXP Levels Required)
- Power Core (W2) (Only without specials)
- Booster M2 (W1)
- Booster M3 (W3)
- Diamond Ore Detector (W1)
- Netherite Ore Detector (W1)
- Energy Blaster M3 (W2) (Elemental if a special ingredient is used.)
- Energy Rail M2 (W2) (Elemental if a special ingredient is used.)
- Power Drill M3 (W2)
- Power Saw M3 (W2)
- 1-12 points (1 EXP level required)
- 13-20 points (2 EXP Levels required)
- 21-32 Points (4 EXP Levels required)
- 33+ Points (8 EXP Levels required)
TECHNICAL JUNK (TOTEMS)
Modded Totems have the following properties; they can be wielded by other entities such as Illagers; and some illagers will eventually spawn with various totems in upcoming structures.
- The Totem of Restoration restores half a heart every three and a half seconds when held in either hand. Can be wielded by other mobs; (In which case it heals them semi-randomly.)
- The Totem of Leagues provides a significant increase to speed, and a small jump increase; at the expense of consuming half a hunger shank every three seconds. Can be wielded by other mobs.
- The Totem of Duat provides ambient fire resistance when held. Can be wielded other mobs.
- The Totem of Rejuvenation grants Regeneration II to the wielder whenever they take too much damage in one sitting, and consumes hunger shanks based on the amount of hearts it heals. It requires hunger shanks to function for players.
- The Totem of Vision provides ambient night vision, and adds the glowing effect to nearby entities.
- The Totem of Power provides ambient strength, and a small amount of ambient fortitude. Can be wielded by other mobs.
- The Totem of Hurdling negates all fall damage when held, and provides an ambient jump boost. Can be wielded by other mobs.
- The Totem of Abzu provides ambient dolphin’s grace when held.
- The Totem of Vanishing renders the wielder invisible upon taking damage when below half health, and grants a low level regeneration effect.
- The Totem of Levitation nullifies all downwards velocity when used in midair.
- The Totem of Venom inflicts poison on all nearby entities. It could technically be wielded by other mobs, but would be kind of problematic.
- The Totem of Infliction damages all nearby entities whenever the wielder takes damage; at half the amount of the damage taken. It can be wielded by other mobs.
- The Totem of Binding inflicts slowness on all nearby entities. Similar to the Totem of Venom, it could technically be wielded by other mobs.
- The Totem of Fortitude renders the wielder nearly invincible when used, at the expense of inflicting a bit of weakness and slowness; and having a fairly long cooldown. Use it strategically, as the negative side effects endure longer than the positive ones…
HIGHLIGHTS & CREDIT
First off, I want to give a shout out to all the fantastic sound designers and Pixabay; in particular Audio Papkin, whose sound effects I mixed and sampled in Audacity to make all of the blaster and rail SFX. I couldn’t possibly have made everything immersive without such a wide variety of custom sounds, and I highly recommend checking it out if you’re in need of unique sound design. And of course, I want to give a shout out to all the great people at Pylo who make Mcreator a fantastic option for people with an extremely limited knowledge of coding, (such as myself.)
This is BY FAR my biggest project yet, and it’s barely even begun! I’m really looking forward to updating all the game’s structures, especially now that I’ve got such a wide variety of new mechanics to work with. (Or at least a ludicrous amount of pottery to decorate with.) All told this took about three times as long and twice as much file space as anything I’ve developed thusfar,
My favorite part was probably the Copper Golems, if only because they were astonishingly easy to get working, and, (even though my original intent was to make them less cutesy and dorky looking than the mob vote version), the textures turned out adorable in spite of my best efforts. These were the last things I added, and I was seriously considering cutting them given how long everything else was taken, so I was incredibly pleased when they worked more or less first try. The lightning rod, incidentally, was also going to be removed, but I needed a way to justify why the energy beams were firing from the top part of the mob, and thus begrudgingly included them again…
My least favorite part was easily the pottery. It’s easy enough to say, ‘oh, let’s add custom pots to the game,’ and, ‘oh, let’s make two different types of pots… and sixteen different colors… and unique illustrations… and three different shapes…” I’m all for customization, and the idea looked fantastic on paper, but I really don’t think I realized just what a mess I was getting into when I started…
…and about 192 unique textures later, I took a step back, realized that I had just spent the past week or two illustrating pixelated pottery, briefly questioned what the hell I was doing with my summer vacation, and then begrudgingly concluded that even if it had been a dizzying amount of work, it was well worth the effort…



Add a comment